Showing posts with label Work Table Wednesday. Show all posts

Wednesday, November 2, 2011

Work Table Wednesday...Spray Paint Texturing

It has been my privilege for the last couple of weeks to be a mentor to a wonderful young artist while she worked on her senior graduation project. 

Krista and Me
Krista chose to learn about the art of grafiti and for her product she painted a grafiti mural. I was amazed at how she was able to get in her zone and paint while I snapped away with my camera. This is something hard for seasoned artists to learn to do and for some of us we just never even attempt it.

I was able to document most of the process and I just finished looking over all of the photos. I didn't know just how much could be achieved with spray paints. I wanted to show you the technique she used that was my favorite.

Experimenting with layering, and negative and positive spaces.
Okay, now to the start the real deal.
Watch closely.


TA DAA!


Are you blown away yet?  I think this would be a great advertisement for Valspar spray paints!

So, I will cut to the chase and show you the almost finished product.


 I can't reveal the finished piece yet because she hasn't presented it but, you get the idea. 

I watched in awe these past couple of weeks as Krista learned to control the flow of the spray and to manipulate drips and dribbles for the effects she was after. 

I will never look at spray paint the same again! 

Have any of you been to San Francisco and seen the street art? That was her inspiration. I am so proud of her!

Wednesday, October 26, 2011

Work Table Wednesday

Lots on the worktable this week...and it looks like it will stay that way for many weeks to come. Yay!

I have two worktables in the my studio these days. The large 8' x 8' upstairs in the actual studio space and a new to me old metal porch set that I got at an auction for $2. One of the best deals ever!


Have I mentioned I LOVE my studio? I really do. I know I am very fortunate to have such a great place to work. A few weeks ago, I decided to take back some work space downstairs in the shop, rearranged, moved in the table and set up an area for making candles and other projects I wouldn't want to work on upstairs for some reason or another. It makes a nice display piece too when I'm not using it for a work table.

The new work table area
It used to look like this back there
I made my first batch of Holiday soy candles yesterday...Pumpkin Souffle.  It was so nice to have everything in one place and not have to mess up my kitchen and dining room. The studio and shop smell like Thanksgiving Day. Yum!

My brother-in-law, the plumber, got us this old farm sink and Rick built the base.  I'm using an enamel table top as a back splash until I find another use for it.  The shelf above is an old green chippy locker door.

I'm using found objects as candle containers this season. Can't wait to show you how cute! 

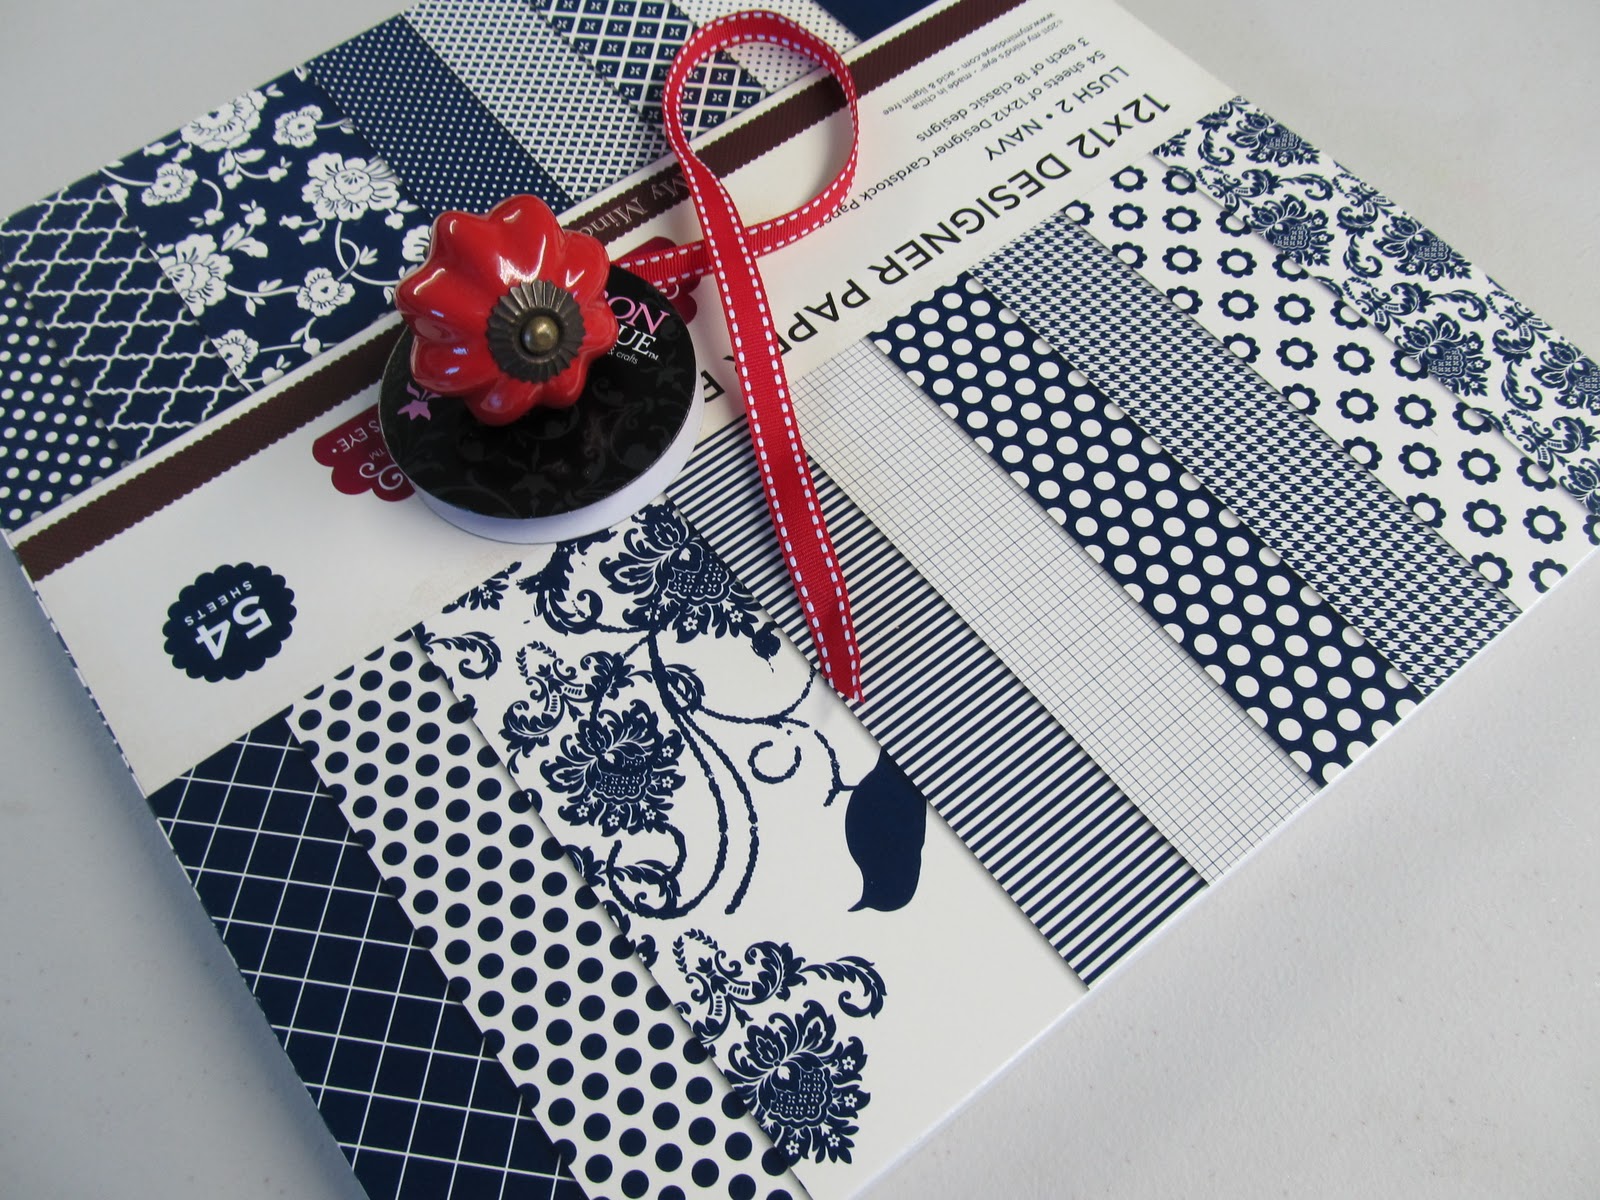
 Upstairs, on the big table are three file boxes awaiting embellishments. They are the same file boxes from the Container Store that I used on the last keepsake box project.

Such a nice box to start with!

Two boxes are for little boys and the other one obviously is for a little girl. I've shopped for papers and other embellishments and now I have to get busy piecing it all together. I'm still looking for what I want to use for feet.

For a boy with navy and other blues and red as an accent

For a boy with classy Ralph Lauren type patterns

For a girl with a bold floral and polka dots

I should be pretty far along by next Wednesday and hopefully they will already begin to look like the keepsake boxes they are meant to be. Stop by for Work Table Wednesday next week and see.

So, back to the work table(s). What are you working on this week?

Wednesday, August 10, 2011

Work Table Wednesday - Artisan Boxes

On my worktable are new boxes. I've said over and over...I'm obsessed and I can't stop making them. Last weekend at our opening I sold one of the cutest ever...

Girls Rule Box
I made it with a teenage girl in mind and doggone if one didn't walk right to it and pick it up. We both were thrilled! If you will notice the cute little knob on top...It's from an old pot lid I think...just one of those things in my stash waiting on a job. I thought it was the perfect touch.

Nowhere does it say boys drool, but we all know...they do! 
My boxes have evolved somewhat since the first ones I made out of necessity. (See below). I made them for the jewelry armoire I repurposed from an old clock case. You can read that story here...A Clock Case No Longer. I'm finding that they all need feet of some sort and a special topper that is something recycled and sometimes repurposed.

My very first embellished boxes
Although the stickers were nice at the time I'm  using them less now and only for recycled jewelry boxes where only the tops are embellished.  These little boxes were not finished inside so I decided to use them as gift boxes and made four more for the armoire.

My second set
These are a little more refined with finished insides and hand painted embellishments.

This week I am working on a new 7 inch square box that is also a clock...

Beginnings of clock box
It's a commission and I have until the last of September to get it finished and shipped, but I have to get with it
before my busy season hits full force. This is what I have so far....papers, rhinestones, clockworks, wooden ball feet and ribbon...


...and a hand painted hair hide top.


I've been saving this pink paper for almost a year waiting on just the right box. I love the tooled look. It's already been sealed inside and out for a nice sheen and protection for many years of use.

I have some pretty cool ideas for the rest of it...only I don't actually have all the parts I plan to use yet!  Ebay here I come!

I did, however finish a cowboy box last week and it's going in our etsy shop when I get a minute to list some things. I can see this on a bookshelf with leather bound books and trophies...or up on a chest of drawers to the side of whatever is framed above it. I hope that whomever buys it will let me know how they use it.

7" Square Box
Off to bed, tomorrow's a new day for a new box!


Wednesday, March 9, 2011

Playing Catch-Up


According to my calendar this floorcloth should have been finished last Friday. Being sick with the flu for a week sure put a hurting on my schedule, but I'm making good time this week since this is a standard design and I already have the measurements, and templates ready. I am updating a couple of the colors, but not by much. Turquoise and red are still very classic in western design. I will add the bears this afternoon and hopefully wrap it up by tomorrow and be ready to cut and prime canvas for the next three floorcloths. To see what this floorcloth will look like click here....Hugging Bear with fringe (This one will not have fringe)


I'm starting a round floorcloth next week that should take me about two weeks to complete. It too is a standard design, but I've not done it as a round rug yet. I'm excited to start it. The colors are bold and exotic, as you can see in the color bars above. I bought paint yesterday and I just can't wait to get cracking!

I guess this makes for one of the most boring posts ever...I'm just trying to get back into the swing of posting! It's all I can do to stop for five minutes and do this. Thanks for  hanging in here with me! As I get caught back up I will do a better job keeping you updated.

Thursday, February 17, 2011

My Newest Work and My Inspirations

Newest floorcloth

The newest floorcloth is coming along very well. It will be finished on Friday...tomorrow...well, maybe Saturday. I always give it a day or two before I apply the finish coats of poly. It never fails that I find a pencil mark or some detail that I've overlooked...and sometimes it is then, when I should really be finished, that I get a new inspiration and add something that I wonder why I hadn't thought of from the beginning. But, that's the beauty of this business! Floorcloths can be changed and reworked...or even started over before the finish is applied. 

Finish coat?...floorcloth?...what? If this is the first time you've visited my blog and don't know what in the world I'm talking about..In a brief description, a floorcloth is a hand painted #8 canvas(the weight varies by maker) that is essentially a hand built rug. I begin with raw canvas, build up layers of paint to form a smooth and flexible surface, hem the edges, paint the design, and seal the design with many coats acrylic polyurethane. For a more thorough description and the history of floorcloths you may want to visit the About Our Floorcloths page on my website.


This one is another 4' x 6' and will be debuted at the Design America-Texas show in May. Like most of my designs, it will work in almost any size you need. All of my standard designs are available in any size and you can even request custom colors at no additional cost per square foot. Our Standard Floorcloth page on the website lists the most common sizes, but I can do anything that works for you...even the shape.

Because I have a studio on our farm and have very little overhead, I've managed to keep my prices the same for the last few years, even though materials and shipping have gone up annually. I still ship floorcloth orders free in the Continental US, so when you are comparing my rugs with other makers you will want to keep this in mind. The average 4' x 6' floorcloth  ships for about $35 depending on the distance between you and I. If you're like me, it's hard to spend money on something you can't see even if it's necessary...like the plumbing, your heating system and yes taxes! So, it's my pleasure to ship your order free.

This spring, I will introduce four new designs, including one round rug and another in the Neon series like you see below. I'm sometimes very surprised at my inspirations and they seem to come out of nowhere to suddenly now here! (Heard that one from Wayne Dyer and I love it!) 

The Neons have been really popular for recreation rooms and kitchens...and were the idea of my son, who was in the 8th grade at  the time. "Hey Mom, why don't you use the glow in the dark stuff like you used with our Halloween sweatshirts when we were little?" I did, and it worked. When you turn off the lights, the outlines glow in the dark and look almost neon-like.

Neon Cowboy Cafe...inspired by a photo of Dryk Godby from the inside of his CD cover. This one is actually mine but yours could have any caption you'd like! 
Click on the link to Dyrk's website and check out his art and music. I'm a big fan of both and have have decorated our home with several pieces of his art. We have the two shown below are in our kitchen and living room along with several originals.  

Countin' 'em Out by Dryk Godby

Legendary Studs by Dryk Godby

Dyrk's attention to detail has been very inspirational to me. I hope you will try to see it first hand and I'm sure you will become a collector as well if you have a love for horses and the authentic western lifestyle. 

Next week I will have a preview of the newest Neon floorcloth for you. I hope you will stop by for a peek.

Tomorrow, is Friday's Featured Shop Items here on the blog. Remember, if you're local, our shop is open on Fridays and Saturdays now. Come out to see us! 

Wednesday, February 2, 2011

The Countdown has Begun to Design America-Texas

With February here, I realized yesterday that I have three months to produce a booth full of floorcloths for the show in Texas. I sat down at my drawing table last week while the base coats were drying on two 4' x 6' floorcloths and several pieces of canvas slated for use as table top pieces.

Essentially, I know what is going up for display, and time will tell what I take in addition to those seven pieces. It's been years since I've done a retail show because I mostly work on custom orders and have no inventory to speak of.  It's not by choice that I work that way, but for the mere fact that floorcloths are so easily customized...size, color, design,...you name it.  When I exhibited at the Western Design Conference, I only took one or two pieces with me because it was a gallery style show. So, to be honest, I'm feeling just a little overwhelmed at the moment.

I will tell you, it's a difficult call as to what to paint when I can actually paint anything I want to. I have two new designs in my head that haven't quite come together yet, so I'm starting today on a design from 2009, but with updated colors and a new twist here or there.

The new color scheme

The new color scheme is not too far off from the original, which you can see in a tiny framed version there on the side of my worktable. Just enough though to make it look new again and a few added colors for good measure.


Marking off the design
Laying off the design is a lot of fun compared to the previous days of measuring, cutting, priming, measuring some more, and then hemming. I've learned a lot of tricks over the last 20 plus years, and have bought a lot of tools to make work a little easier, but sometimes the simplest things work just as well...

Marking off large circles can be a pill!

Once  you find your center a push pin, a string and a pencil is  just like using a large compass. If only you could do this with a paint brush!

Later today, I will start painting...which is heaven to me. I will resent stopping when it's time and will be excited to start again tomorrow. Check back here for updates on my progress for the show.

More later...I've got to get back to it! 

Wednesday, January 19, 2011

In a Junkin' State of Mind

I've been in a junkin' state of mind all week. One project only inspires another and another. I haven't gotten around to doing all that I've wanted to, but now I'm at least organized enough to make myself a list.

It's only three days until our Junk Camp for Beginners Workshop and I've got several new and simple projects ready to use as examples.

Goodwill frame with embellished horseshoe hanger
 This is a simple 1950's picture frame that I've repainted and distressed in my trademark...it used to be another color before it was this color...style. I've hung it from brown velvet ribbon attached to a rhinestone embellished horseshoe right off Checker's front foot. Well, several years ago actually. He's a barefoot boy now and loves it! Oh, and this is for sale in the shop.

Horseshoe courtesy of Checkers
 How 'bout this sconce? You can see it's a garden digging tool that I've attached to a piece that I'm thinking may be the front of an old radio or some kind of speaker. It had a thin fabric backing... anyway, it turned out really cute. I can see a candle sitting on it or maybe even keys hanging on the teeth. This one too, is for sale at Ranch Dressing Handmade and Vintage.

Digger tool sconce
 The next two are from my personal junk and will go back on my porch where they came from. I'm all about adding feet and bases to things. I've been using this pot as a planter for years in the herb garden but it's almost rusted out and I wanted to bring it onto the covered porch before it was a goner. I added some drawer knobs for feet and a milk cap for a little color. I have just the perfect spot for it on our screened in porch.

Coffee pot turned planter with feet
 And this piece is made from one of my many, many enamelware pans and a ceramic snowflake planter from Goodwill.  After I put it together I realized the base is upside down...I think it looks better that way...evidently. I painted it with gloss and acrylics to look like rusty enamel itself. I believe it turned out better than I imagined. Now, it needs some little winter pots of pansies or some bird seed...haven't decided yet.

Winter birdfeeder  or planter
These are all simple and good beginner projects taking only about an hour more or less to complete. I'm looking forward to the workshop and seeing what the students come up with. I will be sure to post photos next week from the class.

Have you made anything from your junk finds lately?

Thursday, January 13, 2011

My Junk Baby

I wanted to give you a quick peek at one of the junk projects I made this week. Here again for the second week in a row...and only the second week in the new year...that I am a day late posting my Worktable Wednesday post. I hope this is not an indicator of the year to come!

 I do have a legit excuse...I left my camera in the studio last night and by the time I had taken off all my layers and my boots I was NOT going back out. We have a thin layer of ice left from Monday's and Tuesday's storm and by 10:30 last night it just wasn't worth risking a broken leg to blog!

But, here she is...


I don't know that she's completely finished yet. I feel like she needs to be holding something. I'm still looking for that something.


I love her!...and I think she is a real cutie. I've had the baby oil bottle for a while and no one bought it at the last open house so I put it back in my stash. While I was reorganizing some things I found the doll parts that I got at a friend's yard sale last summer. I never know what causes the initial spark but it ignited and I put the two together on my work table and other elements started showing up. As you can see there are pieces of vintage costume jewelry, silk flower petals from left over "Fairy Camp" from years ago, vintage buttons and scrabble pieces.


The frame was a steal (well not literally!) from a flea market last fall. I wish now I'd bought more than the two I came home with. I should have listened to my friend Ruth Ann! 

My junk baby actually hangs straight on her little diaper pin hanger, but I didn't want to leave her up long because the epoxy on the button hadn't completely cured when I snapped the picture.

This is an example of what students can do at our Junk Camp for Beginners workshops on the 22nd and 29th. This little girl will be for sale in Ranch Dressing Handmade and Vintage and may be listed in my Etsy shop as well after the workshops are over.

It's not too late to sign up for the class on the 29th. There are a few seats still available. You can register online or contact me email, phone or text. All of my contact info is in the side bar and in the link above in the About  tab.

More project peeks to come.

Talk to you  soon.